
Soups & Stews
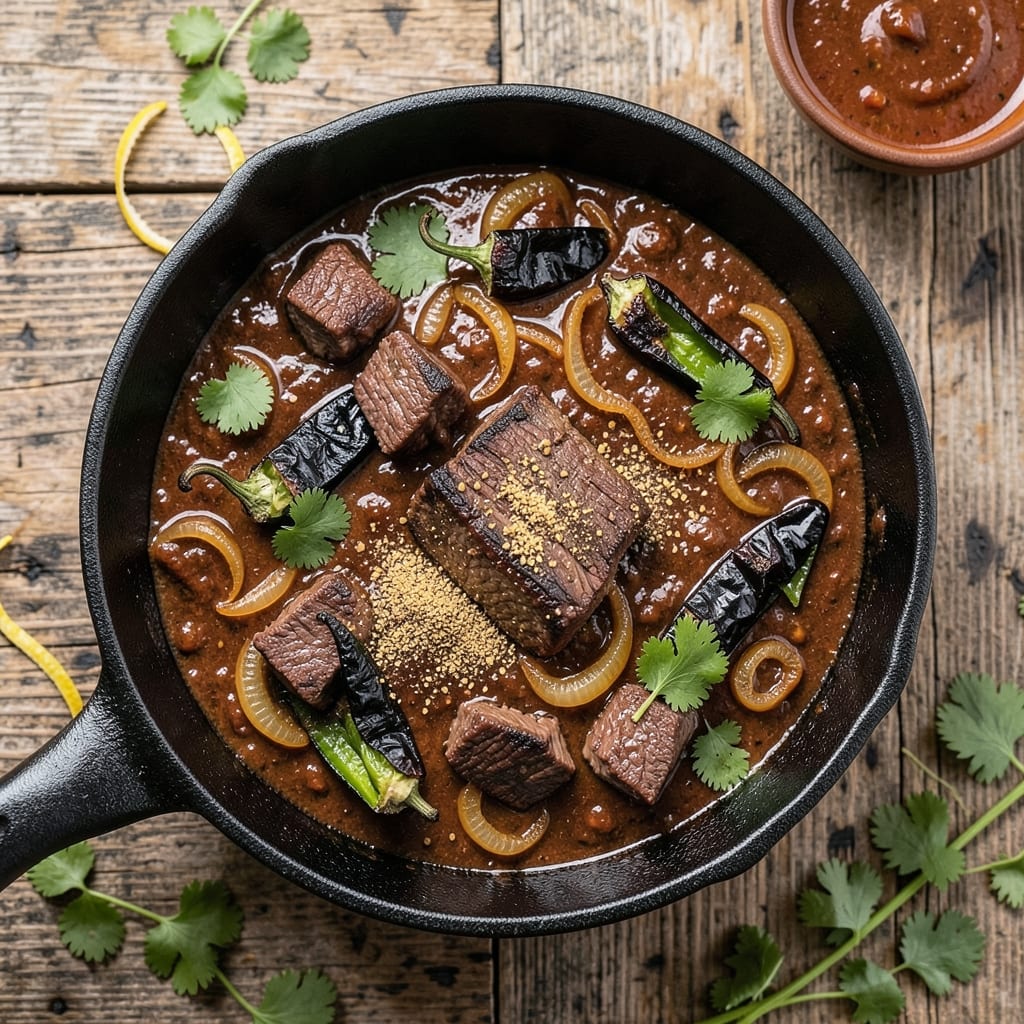
This authentic Mexican beef chili recipe brings the smoky, spicy soul of Mexico to your kitchen with just one pot. The secret lies in charring peppers and toasting spices—techniques that unlock layers of flavor you won’t find in standard chili recipes. I’ve perfected this version over years of testing, balancing heat, depth, and texture for a dish that’s both restaurant-worthy and simple enough for weeknights.
The foundation starts with properly browning beef and building flavor through slow simmering, where cumin, chipotle, and bay leaves infuse the broth with authentic warmth. Unlike American chili, this version incorporates masa harina for a subtle tang and charred poblano peppers for smoky richness. The result? A chili that’s hearty yet balanced—never overwhelming, always satisfying.
What makes this recipe stand out is its versatility. Serve it as a standalone meal with warm tortillas and lime wedges, or let it shine as a centerpiece for game day or family gatherings. The beans stay tender, the meat melts in your mouth, and the spices harmonize perfectly—no aftertaste, just pure flavor. This is chili that feels like a hug.
For modern cooks, this recipe adapts seamlessly to slow cookers or Instant Pots, though the stovetop version delivers the deepest flavor. Whether you’re feeding a crowd or meal prepping for the week, the instructions are clear, the technique foolproof, and the result undeniably authentic. Let’s get cooking.
Ingredients for authentic mexican beef chili
Sixteen ingredients, one pot, and layers of smoky, spiced Mexican flavor you won't find in standard chili recipes.
| Ingredient | Amount | Notes |
|---|---|---|
| Chuck Roast 🥩 | 2 lb | Trimmed of excess fat |
| Poblano Peppers 🌶️ | 2 whole | Charred and peeled |
| Onion 🧅 | 1 whole | Yellow or white, chopped |
| Garlic Cloves 🧄 | 6 cloves | Fresh, minced |
| Ground Cumin 🌿 | 2 tbsp | Toasted for depth |
| Chipotle Powder 🌶️ | 1 ½ tbsp | Smoked, not adobo sauce |
| Dried Oregano 🍃 | 1 tbsp | Mexican oregano preferred |
| Bay Leaves 🌿 | 2 whole | Fresh if available |
| Masa Harina 🍚 | ¼ cup | For subtle tang |
| Black Beans 🫘 | 1 lb | Dried or canned, drained |
| Tomato Paste 🍅 | ½ cup | High-quality, no sugar added |
| Beef Broth 💧 | 3 cups | Low-sodium preferred |
| Lime Juice 🍋 | 2 tbsp | Freshly squeezed |
| Olive Oil 🫒 | 2 tbsp | For browning beef |
| Salt 🧂 | 1 ½ tsp | Kosher or sea salt |
The chuck roast is the heart of this chili—look for well-marbled cuts at your local butcher or grocery store's meat department. Costco or Whole Foods often carry high-quality chuck roast pre-cut for convenience, but if you're buying whole, ask for a piece with good fat distribution. The poblano peppers are non-negotiable for that authentic smoky depth; char them directly over a gas flame or under a broiler until blackened. For the masa harina, Maseca is the brand I trust, and it’s worth the small price for the authentic tang it adds. Toast your cumin seeds in a dry pan for 30 seconds before grinding—this step makes all the difference in flavor complexity.
No chipotle powder? Substitute smoked paprika plus a pinch of cayenne for heat, but you’ll lose some of that smoky chipotle essence. Running short on masa harina? A splash of lime juice plus a pinch of baking soda mimics its tang, though it won’t be identical. For the beans, canned black beans work perfectly—just drain and rinse them well. If you’re using dried, soak them overnight for even tenderness. The tomato paste can be a squeeze tube from Trader Joe’s for convenience, but San Marzano is the gold standard if you want to splurge. Fresh bay leaves elevate the dish, but dried in a pinch (half the amount) still delivers.
This chili tastes even better the next day as flavors meld—portion into airtight containers for easy meal prep. Store in the fridge for up to 5 days or freeze for 3 months in portions. The masa harina and charred peppers can be prepped ahead; just store them separately until ready to cook. For reheating, add a splash of broth or water to prevent drying out. Serve with warm corn tortillas and lime wedges for that authentic Mexican touch—trust me, it’s worth the extra minute to toast them in a dry skillet.
Why You'll Love This Recipe
- One-Pot Magic: Honestly, I dump everything into the same pot—no chopping like an onion ninja, no extra pans. The chuck roast practically melts into tender shreds while the poblanos add just enough smoky depth without me needing to peel or seed them properly. (Yes, even on a Tuesday night.)
- Smoky Depth Bomb: That roasted poblano and cumin combo? It’s the secret weapon—earthy, warm, and lingering. The chuck roast soaks it all up, turning into rich, fall-apart meat that tastes like it simmered all day, even if it didn’t. I’ll be real: my family fights over the last bowl.
- Weeknight Workhorse: This chili doubles as dinner, lunch the next day, and the base for tacos when I’m feeling fancy. Freeze half for when I’m too tired to cook, or serve it over rice for a crowd. My daughter picks out the onions, but still asks for seconds—proof it’s a keeper.
- Budget-Friendly Powerhouse: A single chuck roast feeds six for under $15. The poblanos add sophistication without costing a fortune, and cumin stretches the flavor so it never tastes like a cheap shortcut. Honestly, it’s the kind of meal that makes grocery day feel like a win.
Step-by-step instructions for authentic Mexican beef chili
Here's how to build smoky, complex flavors from scratch in one pot.
Char and Prep the Poblano Peppers and Onion
Heat a dry skillet over medium-high heat. Add the whole poblano peppers and onion (cut in half lengthwise for the peppers, peeled and chopped for the onion). Let them char undisturbed for 5-7 minutes until blackened in spots and softened. Turn occasionally to ensure even charring.
The charring develops deep, smoky flavors that are essential for authentic Mexican chili. Once charred, transfer the peppers to a bowl, cover with plastic wrap, and let them steam for 10 minutes. This makes peeling the skin effortless. Peel the peppers, remove stems and seeds, then chop them finely. Keep the onion in the skillet for now.
Brown the Chuck Roast and Build the Spice Base
In the same skillet, add 2 tablespoons olive oil and increase heat to medium-high. Pat the 2 lb chuck roast dry with paper towels and cut it into 1-inch cubes. Working in batches to avoid crowding, brown the beef for 3-4 minutes per side until deeply golden. Remove the beef and set aside.
Reduce heat to medium and add the chopped charred onion to the skillet. Cook for 2-3 minutes until softened. Add the 6 minced garlic cloves, 2 tablespoons ground cumin, 1.5 tablespoons chipotle powder, and 1 tablespoon dried oregano. Stir constantly for 1 minute until fragrant and the spices release their aromas.
Combine and Simmer the Chili Base
Return the browned beef to the skillet and stir to coat in the spice mixture. Add 0.5 cup tomato paste, 3 cups beef broth, and 1.5 teaspoons salt. Bring to a boil, then reduce heat to low and let it simmer uncovered for 1 hour. Stir occasionally to prevent sticking, and skim off any excess fat that rises to the surface.
After 1 hour, the beef should be tender enough to pull apart with a fork. Add the 1 lb black beans (drained if canned) and 2 whole bay leaves to the pot. Stir gently to combine, then return to a simmer for another 30 minutes. The chili should thicken slightly as it cooks.
Finish with Masa Harina and Lime Juice
Remove the bay leaves from the chili. Stir in the 0.25 cup masa harina and 2 tablespoons lime juice, mixing well to incorporate. The masa harina will thicken the chili and add a subtle tang that balances the richness of the beef. Taste and adjust seasoning with additional salt or lime juice if needed.
Simmer the chili for another 10 minutes to let the flavors meld. The final texture should be thick but still spoonable, with tender beef, creamy beans, and a vibrant, smoky depth. Serve immediately with warm tortillas or cornbread to soak up every last bit of that rich, authentic Mexican chili.
Pro Tips For Making Authentic Mexican Beef Chili
- Char the Cumin: Toast that ground cumin in a dry pan for 30 seconds until it smells nutty and aromatic—don’t skip this, or your chili will taste flat. I used to just toss it in raw, and the flavor was always underwhelming. This step adds depth without overpowering.
- Blister the Poblanos: Roast whole poblanos directly over a gas flame (or under a broiler) until charred in spots—this unlocks their smoky sweetness. Cut them open after and scrape out the seeds before dicing, or you’ll get a bitter aftertaste. (Yes, it’s messy, but worth it.)
- Sear the Chuck in Batches: Cut the chuck roast into 1.5-inch chunks and sear them in a single layer over medium-high heat—don’t crowd the pan. If you rush this, the meat will steam instead of develop a crust, and the chili will taste more like stew than rich, caramelized beef.
- Deglaze with Beer or Tomato: After browning onions and garlic, splash in ½ cup of beer (or tomato paste) to scrape up every last bit of fond from the pot. This adds umami and prevents a dry chili. (I used to waste this step—don’t be like me.)
Storing and reheating this recipe
Refrigerator Storage
Let your chili cool to room temperature for no more than 2 hours before transferring to airtight containers. I use glass Pyrex bowls with snap-on lids—they’re sturdy and prevent odors from seeping in. Store in the fridge at 40°F or below for up to 5 days, but I’ve found the flavors actually deepen after 24 hours as the spices meld. The masa harina and charred peppers keep the chili from getting watery, so you won’t need to add extra liquid when reheating. 🥣
Freezer Prep Tips
For longer storage, portion chili into quart-sized freezer bags (leave 1 inch of headspace for expansion) or airtight containers. Seal tightly to prevent freezer burn, which can dull the smoky flavors. Label with the date—this chili stays delicious for up to 3 months. I like to freeze it in 2-cup portions for easy single servings. Let it thaw overnight in the fridge before reheating for the best texture. ❄️
Stovetop Reheating
My preferred method is stovetop reheating to preserve the chili’s texture. Transfer chili to a heavy-bottomed pot and warm over medium-low heat for 10-12 minutes, stirring occasionally. Add 2-3 tablespoons of beef broth or water if it looks too thick—this prevents the masa harina from making it gummy. Taste and adjust seasoning with lime juice or salt as needed. The stovetop method keeps the beans tender and the beef juicy. 🔥
Microwave Shortcuts
For quick reheating, transfer chili to a microwave-safe bowl and cover loosely with a damp paper towel. Heat on 50% power in 1-minute intervals, stirring between each interval, until reaching 165°F internal temperature. Avoid full power—it can make the chili dry or rubbery. If needed, add a splash of broth to restore moisture. This method works best for 1-2 servings at a time. ✨
Slow Cooker Revival
If you have leftover chili in the fridge, transfer it to a slow cooker on low heat for 2-3 hours with ½ cup beef broth. This gently reheats the chili while keeping the beans creamy and the beef tender. It’s perfect for serving a crowd or reheating large batches. The slow cooker also helps redistribute flavors evenly, making every spoonful taste like it just came out of the pot. 💫
Serving After Reheating
Once reheated, let your chili rest for 5 minutes before serving. This allows the masa harina to set slightly and the flavors to settle. Garnish with fresh cilantro, diced avocado, or a squeeze of lime to brighten the dish. Serve with warm corn tortillas or crusty bread to soak up every last bit of that smoky, spiced goodness. Trust me, the first bite after reheating will taste just as amazing as the first time. 🌶️
Nutrition facts
Frequently asked questions
Why does this chili use masa harina instead of flour?
Masa harina adds a subtle tangy depth that flour can't replicate—it's a key ingredient in authentic Mexican cooking. The corn-based powder thickens the chili while giving it that signature Mexican flavor profile. Think of it as the secret ingredient that elevates this beyond regular chili.
Can I make this chili in a slow cooker or Instant Pot?
For slow cookers, brown the beef first, then combine everything and cook on low for 6-8 hours or high for 3-4 hours. For Instant Pots, use the sauté function to brown the beef, then pressure cook on high for 25 minutes (natural release). Both methods work, but stovetop gives the deepest flavor.
How do I adjust the heat level?
Start with the chipotle powder as written for mild heat. For more spice, add ½ teaspoon cayenne pepper or 1 teaspoon hot sauce. To reduce heat, omit the cayenne and use 1 teaspoon smoked paprika instead of chipotle. Always taste as you go—Mexican chili should be flavorful, not painful!
What's the best way to serve this chili?
Serve it with warm corn tortillas, crusty bread, or cilantro-lime rice. Top with fresh cilantro, diced avocado, crumbled queso fresco, and a squeeze of lime. The acidity from the lime cuts through the richness, balancing all the flavors perfectly.
Can I substitute ground beef for chuck roast?
You can, but the texture will be different. Chuck roast stays tender and flavorful when slow-cooked, while ground beef can make the chili too greasy. If using ground beef, reduce the cooking time to 45 minutes after adding beans and increase the tomato paste to ½ cup to help thicken it.